Wednesday, June 6, 2012

Part 3: Setup WinDBG as a server to solve BSOD


Part 3: Configuration

WinDBG is setup and ready, now we need memory dump file to analyze. When I started writing this demo, I didn’t have any real world dump file, but in the end I found one and you can see demo in the last. for Here there is a trick, you can have dump file, by crashing  system manually. Source  http://support.microsoft.com/kb/969028.
 
I tried to download Notmyfault utility from http://download.sysinternals.com/Files/Notmyfault.zip, but it is not available there I found the software on http://www.afterdawn.com/software/system_tools/misc_system_tools/notmyfault.cfm download and unzip it under c:\notmyfault folder (create notmyfault folder under c drive).
 
Run NotMyfault.exe from c:\Notmyfault\x64.

Congrats you have just crashed your system and created memory dump file.
Note: Do not try this on your pc or production systems I am here crashing it in virtual machine Lab.
Once it will done writing to dump file, system will restart automatically.
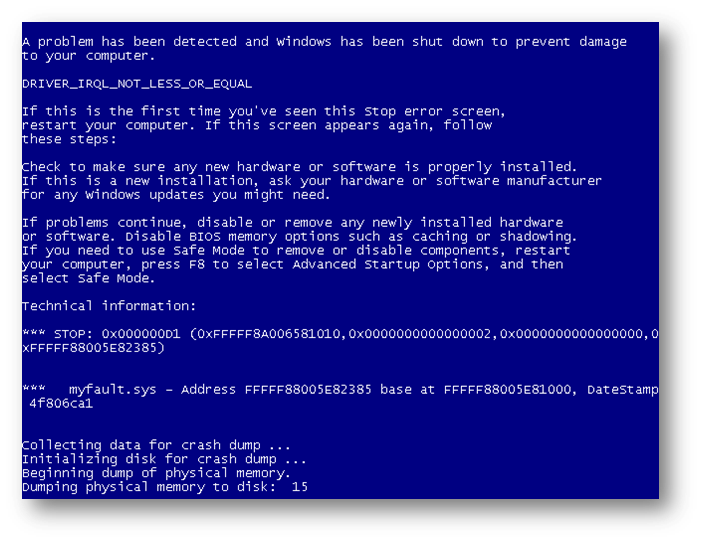
Currently my dump setting is set to minidump file, and I crashed my computer twice, it has created 2 files. You can set dump file settings to full memory dump or kernel memory dump and see the results.


After installation, you will find new programs installed under  Start>All Programs>Windows Kits>Debugging tools for windows
Click WinDBG (X64). WinDBG is a pure debugger tool, specially designed for Microsoft application developers. 

What are symbol files?
In next stage you need symbols in order to be able to do effective debugging. I will call it as WinDBG dictionary from where WinDBG decode dump files.

Next  you need to configure Symbol files location and server path
You can alter the symbols store location, you can set it to another drive. Here I am using srv*c:\symbols*http://msdl.microsoft.com/download/symbols which will save symbols files to c:\symbols and download from http://msdl.microsoft.com/download/symbols,

There are also symbols available from citrix if you want check bug files generated on citrix server. Below is the list.

  1. Value for non-Microsoft employees:
srv*c:\symbols*http://msdl.microsoft.com/download/symbols
For Microsoft employees:
srv*c:\symbols*http://symweb
  1. 2.       Symbol Server (Citrix):
           srv*c:\css*http://ctxsym.citrix.com/symbols
Click file>Open Crash Dump  or press Ctrl+D.
Navigate to c:\dump\minidump and select latest memory dump file. Press open.

It will download partial necessary symbol files to decode dump file. It will take time depending on your internet speed.  you can check the c:\symbols folder size later as it is growing slowly.


As from above screenshot Windbg detected myfault.sys file is the culprit. Now you can google or search files and folders for the filename on your computer and determine what driver or software is associated to myfault.sys. when we run notmyfault.exe check the other file name located in the same folder. Once you get what application or driver is causing error upgrade it to stable version or also check Hardware relying on drivers or software.

Here we have successfully postmortem'ed minidump file. Now we are going to capture Kernel memory dump file. For this change write debugging information and dump file location.
 
This time I will show you another method of crashing system, and don’t need any utility, simply go to Task manager and end process tree of csrss.

 
This will generate BSOD and create Memory.dump file under c:\dump. After restart open WinDGB>file> open crash dump> Navigate to c:\dump and open Memory.dump file.

Once the cmd prompt opened type !analyze - v command for detailed debug logs.
 
As you can see csrss.exe caused BSOD.

Download  full PDF of this article from http://kunaludapi.weebly.com.

Tuesday, June 5, 2012

Part 2: Setup WinDBG as a server to solve BSOD


Part 2: Dowanload and install WinDBG.

WinDBG is a part of Windows drivers kit (619MB ISO) also called WDK and Windows Software Development Kit (SDK), Here I am using  SDK to download. go to http://msdn.microsoft.com/en-us/windows/hardware/hh852363 and download sdksetup.exe file.
Downloaded file is just a 701 kb in size, before starting installation make sure your internet connection is working as it will download component and required softwares from internet, You must be a administrator to install this file, right click and run as administrator
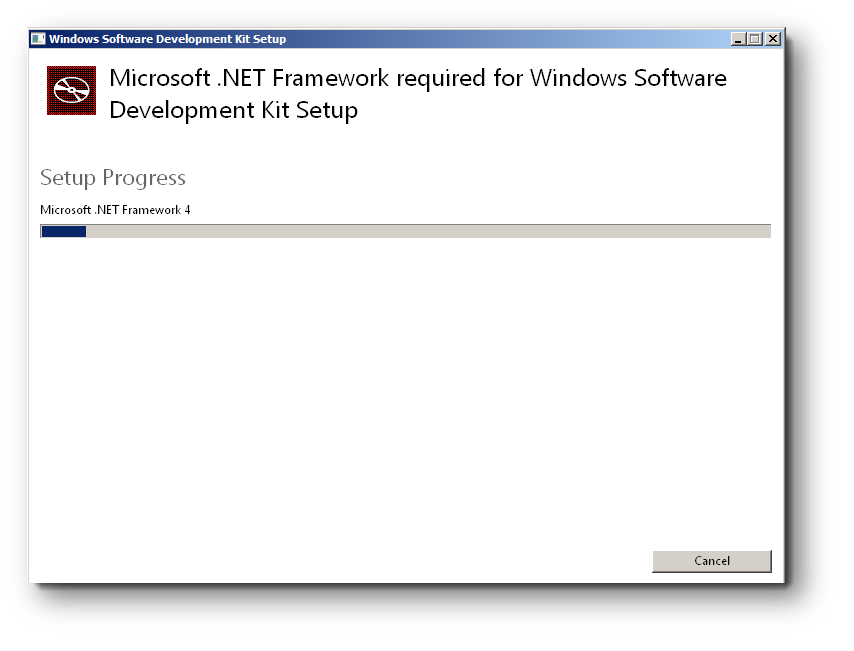
Installation will start downloading Microsoft .net framework 4 and setup it to proceed, which will be downloaded from internet, (if you have already installed .net 4 it will not download), check I accept the Microsoft .NET Framework license terms and click Accept & Install.  
It will take time depending on your internet speed.
Once installation completes, It will ask you where to store setup package files on the server (I am choosing this option incase in future if I need to install WinDBG on another server, and don't have to download it again), I have created Temp folder under C drive and store all the setup files, and will manually do installation once download finished. Click next to proceed.
I am keeping defaults here and clicking next.
 Select Debugging tools for windows and deselect other selection. Now you will see it will be downloading 115 MB of data, this is why I chose SDK (around 250 MB) over windows drivers kit WDK (619.8 MB). Click download to start it.
Once the download completes you are ready to install WinDBG, open c:\temp folder (backup or copy c:\temp folder to central location in case if you need to install the same on another computer, no need to download it again) and run sdksetup.exe (you must be an administrator to install it) or right click and click run as administrator.
I am keeping all the defaults and pressing next

As we are not going to install .net framework 4.5 SDK you can ignore warning and press next.
Accept the license agreement
Start installation by pressing Accept.


All you have done now. Windbg is downloaded and installed successfully, all you need to do is configure it.

Download  full PDF of this article from http://kunaludapi.weebly.com.

Part 1: Setup WinDBG as a server to solve BSOD


Setup WinDBG as a server


Have you ever faced BSOD (Blue screen of death) problem on your system and ever want a root cause why it is happening, well I will try here to solve the problem.

Note: for your information, I will not suggest you  to use your daily using systems or production environment, Her I have done all tests and labs on my virtual environment. I won't be responsible for any damage.

In this demo I am using 2 windows 2008 64 bit VM and 1 windows 7 VM which is set up on vmware workstation.

Part1:  What is WinDBG?

What is BSOD?
System OS crashed or halted by unrecoverable error.

What are these errors?
This could be (Faulty/incompatible) Hardware, outdated BIOS & firmware, (buggy) softwares, (could include (buggy/out dated) Drivers, incompatible patch).


How can I determine what is causing error? And what softwares are used?
WinDBG is a free debugger tool, which reads dump file.

What is dump file?
Whenever system is crashed it create dump file, and this dump file has all the answer. It contains data, (Memory Map) that was in the memory when system crashed, you can use it as a point in time to see what was in memory when system crashed.
 
 There are 3 types of dump files which are used for analyses:  
  • Complete memory dump saved in %SystemRoot%\MEMORY.DMP,
  • Kernel memory dump saved in %SystemRoot%\MEMORY.DMP
  • Small memory dump (64 KB) saved  %SystemRoot%\Minidump
* %systemroot% is path equal to "C:\windows" for windows 2003 and later operating system.
Read Microsoft KB on for detailed information about memory dump files http://support.microsoft.com/kb/254649

You can configure windows settings which dump file you want to generate
Simply Go to start, right click computer, choose properties
Click "Advance system settings"
 Click on setting  under Startup and Recovery.
 Create a "Dump" folder under C drive, Here I am changing the path of each memory dump file path to C:\Dump, for better management and easy portability of dump files Rather than keeping default.

If you have more than 2 GB of ram you will not able to see complete memory dump in drop down list. By default system will create Kernel memory dump file, you can use drop down list and select which dump file you want to create.  

Select small memory dump (256 KB) and set dump file location to c:\dump\minidump.

Download  full PDF of this article from http://kunaludapi.weebly.com.

Wednesday, May 23, 2012

Get HyperV working inside vmware workstation 8


How do you get HyperV working inside vmware workstation 8?
I purchased new AMD FX series (FX-6100) CPU, I installed Windows 2008 R2 on VMware workstation then installed Hyper-V role inside it, but I failed to start VM because it was saying you need to enable AMD-V technology or it is missing, I enabled the feature in BIOS and in virtual machine settings itself. 
But I was still facing below error when tried to start VM on Hyper-V manager.
After some googling on internet I found very useful article to run HyperV inside Vmware Workstation.

Source:

followed the steps and done the necessary changes in .VMX file, added hypervisor.cpuid.v0 = "FALSE" and tried starting VM again (Shutdown windows 2008 R2 VM and then changed settings), again the same above error, I tried reinstalling and  installing all the things again, (OS, vmware workstation, VM), after frustrating 2-3 hours same error again and again. Tried many softwares to determine whether my CPU support all the virtualization features or not, everything was green


Sources

from every above softwares (inside VM and on desktop) it was clearly showing my CPU is suitable for Hyper-v. I went to microsoft site to check what are the requirements for HyperV and found solution.

There is a AVX feature in new CPUs (Intel and AMD) which is not supported by HyperV. to check this feature you can use tool from Coreinfo (from Microsoft Sysinternals)  or CPUID.
There is a * (star) in front of the features (instructions) means it is present and supported and - (dash) means they are not supported or not present.
To disable AVX run command from (in VM where you installed windows 2008 r2) CMD "bcdedit /set xsavedisable 1" or install patch http://support.microsoft.com/hotfix/KBHotfix.aspx?kbnum=2517374&kbln=en-us. Either run patch or run command.
source:
 In my case I ran only above command inside the VM, didn't install patch.
After all the settings done. I felt like piece of cake.

Monday, April 23, 2012